Sunday, September 25, 2022

FMW/WLS New Configuration with Latest JDK Failing to Start - ConfigException: Identity key store file not found: DemoIdentity.jks

Symptoms

When installing Oracle Fusion Middleware and/or Oracle WebLogic Server 12c, there is a "weblogic.nodemanager.common.ConfigException: Identity key store file not found" error looking for DemoIdentity.jks. This happens for both WebLogic Server and Nodemanager startup. Full error stacks included below:

WebLogic Server:

<Feb 6, 2018 10:16:38,503 PM JST> <Alert> <Security> <BEA-090165> <Cannot find identity keystore file <DOMAIN_HOME>/security/DemoIdentity.jks on server AdminServer>
<Feb 6, 2018 10:16:38,504 PM JST> <Error> <WebLogicServer> <BEA-000297> <Inconsistent security configuration, weblogic.management.configuration.ConfigurationException: Cannot find identity keystore file <DOMAIN_HOME>/security/DemoIdentity.jks on server AdminServer>
<Feb 6, 2018 10:16:38,504 PM JST> <Emergency> <Security> <BEA-090034> <Not listening for SSL, weblogic.management.configuration.ConfigurationException: Cannot find identity keystore file <DOMAIN_HOME>/security/DemoIdentity.jks on server AdminServer.>
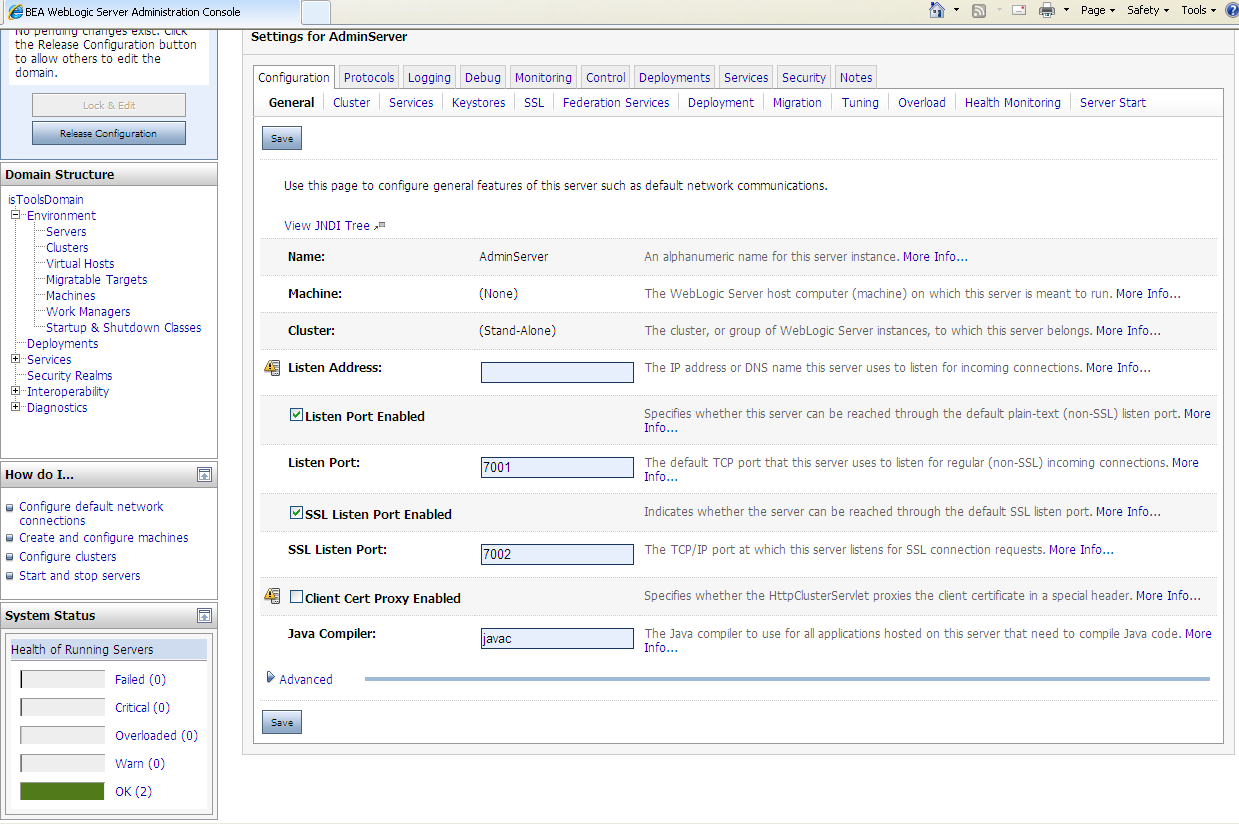
<Feb 6, 2018 10:16:38,505 PM JST> <Error> <Server> <BEA-002606> <The server is unable to create a server socket for listening on channel "DefaultSecure[iiops][5]". The address 127.0.0.1 might be incorrect or another process is using port 7002: java.io.IOException: Cannot find identity keystore file <DOMAIN_HOME>/security/DemoIdentity.jks on server AdminServer>

Nodemanager:

<Feb 6, 2018 9:58:31 PM JST> <INFO> <Loading identity key store: FileName=<DOMAIN_HOME>/security/DemoIdentity.jks, Type=jks, PassPhraseUsed=true>
<Feb 6, 2018 9:58:31 PM JST> <SEVERE> <Fatal error in NodeManager server>
weblogic.nodemanager.common.ConfigException: Identity key store file not found: <DOMAIN_HOME>/security/DemoIdentity.jks
at weblogic.nodemanager.server.SSLConfig.loadKeyStoreConfig(SSLConfig.java:225)
at weblogic.nodemanager.server.SSLConfig.access$000(SSLConfig.java:33)
at weblogic.nodemanager.server.SSLConfig$1.run(SSLConfig.java:118)
at java.security.AccessController.doPrivileged(Native Method)
at weblogic.nodemanager.server.SSLConfig.<init>(SSLConfig.java:115)
at weblogic.nodemanager.server.NMServer.<init>(NMServer.java:169)
at weblogic.nodemanager.server.NMServer.getInstance(NMServer.java:134)
at weblogic.nodemanager.server.NMServer.main(NMServer.java:589)
at weblogic.NodeManager.main(NodeManager.java:31)
 

Solution:

The following is simplified steps on Linux/UNIX platform. Please see above notes about details.  If you have run the Configuration already and you have applied the PSU, you will not need the -noskid option. 

> cd $ORACLE_HOME/wlserver/server/bin

> . ./setWLSEnv.sh (that is DOT SPACE DOT SLASH setWLSEnv.sh )

> cd $DOMAIN_HOME/security

> java utils.CertGen -keyfilepass DemoIdentityPassPhrase -certfile democert -keyfile demokey -strength 2048 -noskid

> java utils.ImportPrivateKey -keystore DemoIdentity.jks -storepass DemoIdentityKeyStorePassPhrase -keyfile demokey.pem -keyfilepass DemoIdentityPassPhrase -certfile democert.pem -alias demoidentity


Installing Oracle Weblogic 14c (14.1.1) in linux.

Creating users and groups

As root, run the following commands to create the Oracle user and groups:

# sudo -i

The below commands must be executed as root.

Add the groups required by Oracle.

Create the Oracle Inventory group:

# groupadd oinstall

Create the Oracle DBA group:

# groupadd dba

Create the home directory for the Oracle user:

# mkdir /home/oracle/

Create the directory for installing Oracle:

# mkdir -p /u01/app/oracle

Then create the Oracle user account that is a member of the dba group, has the /home/oracle/ home directory and uses /bin/bash as the default shell:

# useradd -g oinstall -G dba -d /home/oracle -s /bin/bash oracle

Set the password for the oracle user (don’t forget this password):

# passwd oracle

Set the oracle user as the owner of the Oracle home directory and Oracle installation directory. The oracle user is a member of the oinstall group.

# chown -R oracle:oinstall /home/oracle

# chown -R oracle:oinstall /u01/app/oracle

Create the directory for Oracle Inventory:

# mkdir -p /u01/app/oraInventory

Set the oracle user as the owner for the Oracle Inventory directory:

# chown -R oracle:oinstall /u01/app/oraInventory
# chmod -R 775 /u01
======================================

Installing Oracle Weblogic Server 14c:

Switch to oracle user.

# su - oracle

Edit .bash_profile of oracle user in vim text editor.

$ vi .bash_profile

Add following environment variables in this file.

export ORACLE_BASE=/u01/app/oracle
export ORACLE_HOME=$ORACLE_BASE/product/14.1.1
export MW_HOME=$ORACLE_HOME
export WLS_HOME=$MW_HOME/wlserver
export DOMAIN_BASE=$ORACLE_HOME/user_projects/domains
export DOMAIN_HOME=$DOMAIN_BASE/base_domain

Execute the .bash_profile script to set environment variables for current Linux shell.

$ . ~/.bash_profile

Execute unzip command to extract Weblogic Generic Installer.

$ unzip fmw_14.1.1.0.0_wls_lite_Disk1_1of1.zip
Archive:  fmw_14.1.1.0.0_wls_lite_Disk1_1of1.zip
  inflating: fmw_14.1.1.0.0_wls_lite_generic.jar

Execute the Generic Installer JAR file by using following java command.

$ java -jar fmw_14.1.1.0.0_wls_lite_generic.jar
Launcher log file is /tmp/OraInstall2022-09-25_05-32-40PM/launcher2022-09-25_05-32-40PM.log.
Extracting the installer . . . . . . Done
 
Checking if CPU speed is above 300 MHz.   Actual 2111.999 MHz    Passed
Checking monitor: must be configured to display at least 256 colors. Actual 16777216 Passed
Checking swap space: must be greater than 512 MB. Actual 923 MB Passed
Checking temp space: must be greater than 300 MB. Actual 7497 MB Passed
 
Preparing to launch the Oracle Universal Installer from /tmp/OraInstall2022-09-25_05-32-40PM
Log: /tmp/OraInstall2022-09-25_05-32-40PM/install2022-09-25_05-32-40PM.log

If you are installing on a Linux server with no graphical support, then you have to configure X11 forwarding by using PuTTY and XMing to get the graphical output at client console.

03-orainventory-setup

Set the OraInventory directory and click on ‘Next’ button.

04-welcome-screen

You are on the welcome page. Click on ‘Next’.

05-configure-auto-update

Select ‘Skip Auto Updates’ and click ‘Next’.

06-weblogic-installation-location

Set the Oracle Home directory here and move to ‘Next’ screen.

07-choose-installation-type

Select the components that you want to install on your application server. You can either install Weblogic Server, Coherence or both.

08-weblogic-prerequisites-checks

Click on ‘Next’.

09-weblogic-installation-summary

Click on ‘Install’ button.

10-weblogic-installation-progress

Click on ‘Next’.

11-weblogic-installation-complete

Uncheck ‘Automatically Launch the Quickstart Configuration Wizard’ and click on ‘Finish’.


Post-Installation Configurations:

If you are planning to deploy a Fusion Middleware product over your WebLogic application server, then you must skip the configuration step. Because the configurations will be performed by the respective FMW product.

Otherwise, you can configure WebLogic Server by executing following script.

$ /u01/app/oracle/product/14.1.1/oracle_common/common/bin/config.sh

12-weblogic-create-domain

Create a Domain for your Weblogic application server.

13-templates

Select a template to create the domain. Click ‘Next’.

14-weblogic-administrative-account

Set a strong password for Weblogic Server administrative user.

15-domain-mode-and-jdk

Select the Domain Mode and JDK for your Application Server.

16-weblogic-advanced-configurations

Click on ‘Next’.

17-wls-configuration-summary

Click on ‘Create’.

18-wls-configuration-progress

Click on ‘Next’.

19-wls-end-of-configurations

Click on ‘Finish’.

WebLogic Server has been configured successfully.

To grant access of your application server to network clients, allow the default service port of WebLogic server in Linux firewall.

# firewall-cmd --permanent --add-port=7001/tcp
success
# firewall-cmd --reload
success

Whenever you start the Weblogic service, it will always ask you for a username / password.

To automate it, you can define the credentials in boot.properties file.

$ mkdir -p $DOMAIN_HOME/servers/AdminServer/security/
$ echo "username=weblogic" > $DOMAIN_HOME/servers/AdminServer/security/boot.properties
$ echo "password=weblogic123" >> $DOMAIN_HOME/servers/AdminServer/security/boot.properties

Start the Oracle Weblogic Server 14c by executing following script.

$ $DOMAIN_HOME/startWebLogic.sh &

Browse URL https://192.168.1.9:7001/console in a web browser

20-wls-administrative-console-login

Login as Administrative user.

21-wls-dashboard

You have reached at the Weblogic Administrative Console.


Wednesday, July 15, 2020

Application is facing issue while fetching data from Database

Application is facing issue while fetching data from Database

Application is facing issue while fetching data from Database

1. Check from console free server memory and number of free DB threads.
2. Take thread dump and analyse server logs which will provide detailed information,if in logs DB error codes are found,provide logs to DB team for their further analysis.
3. With the help of telnet command check whether we are able to connect to DB server or not,issue may be from port or firewall also.
4. If not able to connect successfully, log a ticket to Firewall team and also check with Unix team for any OS related issue.

Exception , Issues with Weblogic Server

Exception , Issues with Weblogic Server


1. Application URL is not accessing.
2. Application performing very slow.
3. Server is down, Crashed.
4. Server is Hang.
5. Database Exceptions.
6. Connection pool closed issues.
7. Space issues.
8. Deployment Issues.
9. File not found exceptions.
10. Out of memory Exception.
      Heap out of memory
      Perm gen space error
11. Null pointer exception.
12. Struck thread in Servers
13. CPU utilization is High
14. socket exceptions.
15. Too many open file exception.
16. Performance issues.
17. Port or listen address already used exception.
18. socket already used exception.
19. Proxy server exceptions
20. Node manager bind exception.
21. Authentication and Authorization. 

Creation and Installation of SSL Certificate for Key tool

SSL Configuration for WebLogic

How to Generate Certificate Using the Key tool for Weblogic

The keytool is special utility provided by the Java to work with Certificates and security stuff. Here in this we will let you know the each option that is useful to create java key store, sign the keystore and

Step 1 Set the WebLogic environment variables available with the PATH, CLASSPATH etc., by issuing C:\bea\weblogic91\server\bin\setWLSEnv.cmd

On UNIX environments, The profile will be set to work, otherwise you can make sure by running setWLSEnv.sh script from $WL_HOME/server/bin path.

Step 2 Create a dedicated folder (SSLCert- anywhere) to store all Certificate stuff in it. Here we made a folder name as ‘cert’ under c:\cert

Step 3  Generating a “sample.jks” file with java keytool command.


keytool -genkey -alias one -keyalg RSA -keystore sample.jks  


Note : Please don’t give space while entering your first name and last name as inputs you can enter as sample shown.

Step 4 Creating a certificate request using keytool with the following command


keytool -certreq -keyalg RSA -alias one -file certreq.csr -keystore sample.jks


Better choice to experiment with trail certificates on test environments. Please don’t use this scenario for production environment. Easy ways to get a kick start at Google and type SSL Certificate and open VeriSign website. Click on “Free 30 day SSL Trial”

Click on VeriSign @ SSL Test Certificate

Step 5

Your browser's padlock icon will be displayed in the locked position if your certificate is installed correctly and the server is properly configured for SSL.

Now you need to enter the data

Open C:\cert\certreq.csr file and copy the content as specified in the below screen and submit the certreq.csr

Click on Submit

You will get the Mail to your mail box as shown below

VeriSign will send you the Certificate file to your email that you enter while registering. There are two important  certificate links

1. Root CA certificate

2. Intermediate CA certificate

Click on each link as shown in the lower side of email message that is for download.

Download the Root CA  

Click the link


Click on select all button and copy in to one text file in C:\bea\SSLCert and named it as CA.pem Go to second link which is given in the email. Do the same for intermediate CA certificate as well.

Copy the content and saved as public.pem

Total 3 files

Step 6: To understand these .pem files to Keytool, We need to follow below steps


keytool -import -alias verisignCA -file CA.pem -keystore sample.jks -trustcacerts


keytool -import -alias verisignIntermediateCA -file Intermediate.pem -keystore sample.jks -trustcacerts


Step 7  converting to trusted


keytool -import -alias one  -file public.pem -keystore sample.jks -trustcacerts


Note : While saving don’t include any spaces in public.pem file

By using below command check all the reports are successfully imported or not

Step  8


keytool -list -keystore mykeystore.jks -v


Go to WebLogic console and enable SSL port

(domain -> adminserver->configuration -> general)

Go to keystore tab.

For SSL Tab add the following changes

Now, restart the WebLogic admin server, open the admin server logs file it will show the following information

Enable Admin server using SSL Port

When you browser with https first time it will be like this…

Now SSL configuration completed.  You can verify that use the https://localhost:7002/console there is no Root CA Certificate in your Browser, install RootCA certificate in your browser

Click on Yes button